Tuesday, July 5, 2022

First Cook in the Pit Barrel Junior: Chuck Roast Burnt Ends

Play video First Cook in the Pit Barrel Junior: Chuck Roast Burnt Ends
▶️ Play First Cook in the Pit Barrel Junior: Chuck Roast Burnt Ends
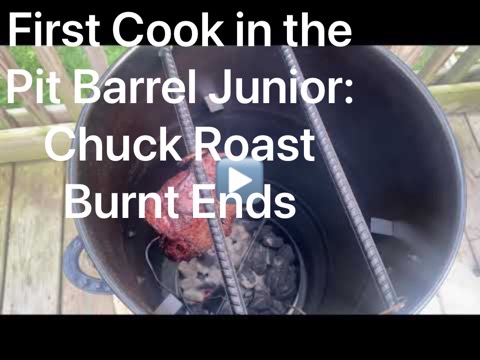
I like using my Weber 22-inch kettle grill. I like using the Slow ‘n Sear with it to do smoking of foods. But there is definitely, at least for me, a fiddle factor that sometimes is more than I want to contend with. Sometimes I want to get the food on and just let it go. That is the single biggest alluring feature of the Pit Barrel Cookers. I purchased the Pit Barrel Junior (PBJ) as the 14-inch diameter drum is likely more than big enough for anything I will do. The classic model, 18 inches in diameter, would certainly be more than enough but it felt like overkill to me. When the PBJ arrived a friend and I spent a bit of time putting the lid assembly together and then puzzling over the ring with the 3 horseshoe shaped pieces of metal on it that the grate had been sitting in in the packaging. This is where Pit Barrel could put a little more effort into the printed directions. They say nothing about what that ring is for and until I saw a picture online and referred to the more detailed online information I eventually found it just did not occur to either of us that the ring with its hotseshoe shaped pieces of metal was a stand for the PBJ. Obvious in hindsight like so many things are.

If I had gotten the PBJ even an hour earlier than I did I think my first cook would have been 4 racks of St. Louis style ribs. I bet they would have come out far better than the what I made on the WEber. Something definitely went worng with that cook and they just were not nearly as tasty as they should have been (a bit dried out; maybe keeping them in the oven set at a temperature of 170F to keep them warm was a mistake). My first cook with the PBJ would be with an approximately 3.5-pound chuck roast that I would turn into burnt ends of a sort.
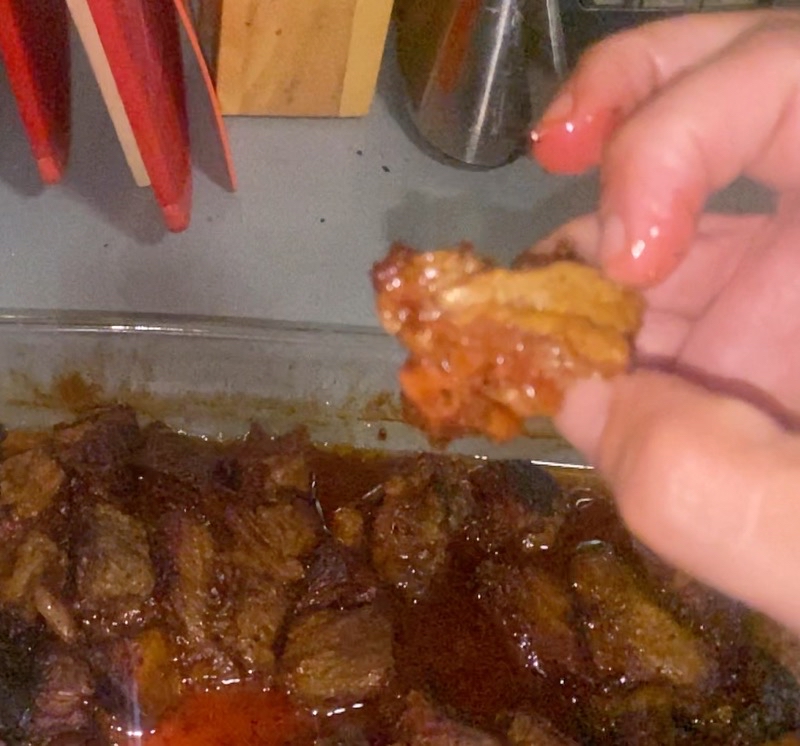
Photo taken Jul 3, 2022 at 12:34 AM

My first version of chuck roast burnt ends made in the Pit Barrel Junior and finished in my oven. There is definitely a learning curve even with something so seemingly simple as the Pit Barrel Cooker.

I prepared the chuck roast with just a basic rub of pretty much equal parts salt, pepper, and garlic. I got the PBJ properly filled and lit (I hoped) and then hung the chuck roast with a single hook on one of the rods in the PBJ. I closed the lid and watched the temerpature rise. And rise. And rise some more. As I understood things the PBJ would run between 275°F and 310°F if I had the lower intake vent (the only vent there is assuming you put the lid on securely) open about one-quarter full. The temperature by the Meater probe was passing 325°F and I did not think it was going to settle down. This was about 30 minutes into the cook. I decided to close the lower vent to about what I thought would be 1/8 open (about one finger width on my right hand). The temperature stopped rising and began to drop. About 45 minutes later it was hoving around 260°F so I decided to tweak the vent open a bit and the temperature rose about 25 degrees. Maybe it is dialed in now for all future cooks.

As far as I could tell things were going reasonably well. That is until the ambient temperature shot pasted my temeprature alarm of 325°F shooting to about 440°F when I got outside to see what was up. What was not up was the chuck roast. It fell off its hook. Maybe the hook was in a part of the meat that rendered away. But the meat was laying on the coals. Not good.
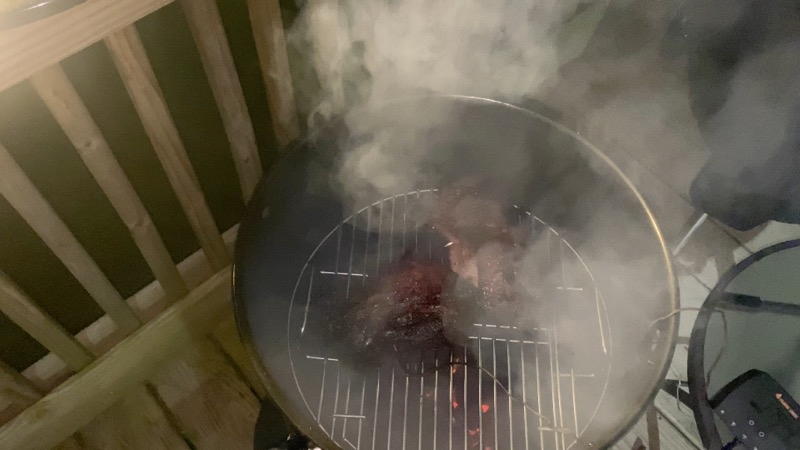
Photo taken Jul 2, 2022 at 10:07 PM

I imagine all the smoke is from the portions of the chuck roast that are burning still a top the coals. It is a good thing I had a Meater temperature probe in the roast because otherwise I never would’ve known that the meat had fallen off. When the ambient temperature soared to 440° F that was certainly a clue.

I pulled it out and decided that it was time to bring it inside to cut into cubes. At this point the internal temperature of the roast was probably around 180°F though I ams ure it was higher in many places. It certainly cut more easily than I would have thought it would for that internal temperature. It was time to cost the cubes in a basic BBQ sauce and let them finish in my oven. The sauce is made of:

  • 1/2 cup catsup
  • 1/4 cup worcestershire sauce
  • 1/2 teaspoon chili powder
  • 1/2 teaspoon salt
  • 2 dashes (maybe more) Tabasco sauce
  • 3/4 cups water

After an hour the cubes were squeezably soft and looked great. My first taste was quite good though I can see m, more importantly taste, room for improvement.

Wednesday, June 15, 2022

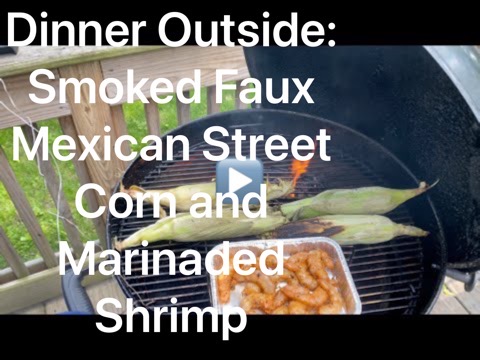
Dinner Outside: Smoked Faux Mexican Street Corn and Marinaded Shrimp

When you want a tasty, quick to make, summertime meal I think corn and shrimp certainly fill the bill. If you can lay your hands on peeled and deveined shrimp it becomes considerably easier. You could cook the shredded mop over direct heat on a hot grill and there are ways to quickly cook corn but I think the modest amount of extra time needed to infuse some Smokey goodness is worth the wait.

Play video Dinner Outside: Smoked Faux Mexican Street Corn and Marinaded Shrimp
▶️ Play Dinner Outside: Smoked Faux Mexican Street Corn and Marinaded Shrimp

Marinaded Shrimp Recipe

  • 1 pound jumbo shrimp (16-20/pound), peeled and deveined
  • 2 cloves garlic, minced
  • 1 (short) tsp kosher salt
  • 1/2 tsp paprika
  • 1/4 tsp cayenne
  • 1 tbsp olive oil
  • 1 tsp lemon juice

Mix up the marinade. You might need a bit more liquid. Coat the shrimp. This is a dish that you cook right away. If grilling on direct heat or cooking on the stovetop the shrimp will cook up in 5-7 minutes. If you want to smoke them I’ve found they take about 25 minutes at 250 F.

Faux Mexican Street Corn

For 4-5 ears of corn

  • 1/4 cup mayo
  • 1/2 tbsp ancho chili powder (I used chipotle)
  • 1/2 tsp paprika
  • Juice of 1/2 lime (~1/2 fluid ounce)
  • Optional: melted butter to coat ears
  • Coteja (feta worked great) cheese.

Instructions

  1. Mix chili-mayo ingredients and put aside until ready (in fridge say)
  2. Cook corn. I put the corn with husks on on indirect heat at about 300 F. It takes about 25 minutes to cook and you should rotate the corn cobs two or three times during the cook.
  3. When the corn is done baste it with butter then mayo mix.
  4. Top with cheese.

Saturday, June 4, 2022

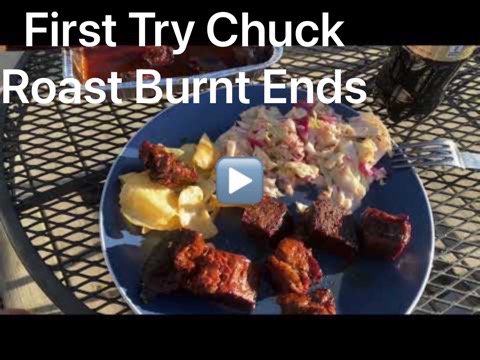
Dinner Outside: Chuck Roast Burnt Ends

Chuck Roast Burnt Ends

Play video First Try Chuck Roast Burnt Ends
▶️ Play First Try Chuck Roast Burnt Ends

This is my first attempt at making these. I seasoned the 1.1 pound chuck roast with some seasoning I had around and placed it in my smoker which was running at about 260° to 275°F. When I was pretty sure the internal temperature of a chuck roast was at 170°F I took it out and turned it into approximately 1 1/2 inch cubes. I placed those cubes in an aluminum pan and then covered them with about 2/3rds cup barbecue sauce and water mixture (about 1/4 cup water). I covered the aluminum pan and returned it to the smoker to cook for about 40 minutes. I did removed the covering foil and let the cubes cook somewhat longer. They probably cooked for about three hours though the last 30 to 40 minutes of that time we’re definitely on a somewhat cooler smoker. The flavor was wonderful but the cubes, some of them were definitely a bit on the larger side, could have been more tender.

Monday, January 24, 2022

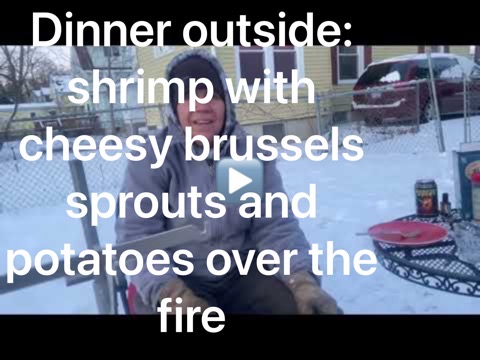
Dinner Outside: Shrimp with Cheesy Brussels Sprouts and Potatoes

Dinner Outside: Shrimp with Cheesy Brussels Sprouts and Potatoes

Play video Dinner outside: shrimp with cheesy brussels sprouts and potatoes over the fire
▶️ Play Dinner Outside: Shrimp with Cheesy Brussels Sprouts and Potatoes Around the Fire

A fresh coat of snow has fallen, the clouds have cleared the way for the sun to shine through, it’s about 21°F, life is good. With a fire burning bright and hot in the Breeo Fire Pit, food cooking on the Weber, appetizers and beer being drunk it has become a completely enjoyable afternoon. Toss in some people making circuits on cross-country skies in the Big Playground and sledding on the puny hill back there and you have the making of a proper wintertime wonderland.

Photo taken Jan 23, 2022 at 4:21 PM

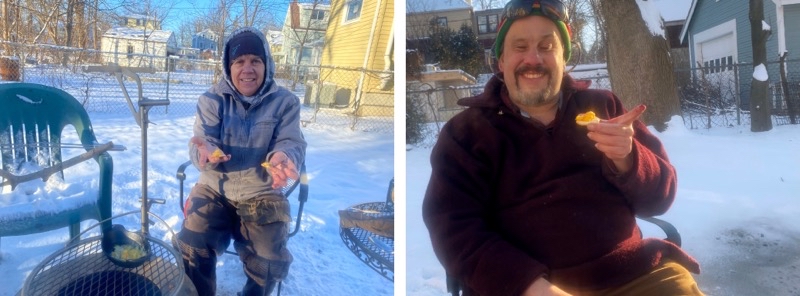
Lil and Ken. While the vegetables are being smoked and long before we even think of putting the shrimps on the grill over the fire we have an appetizer of melted cheese and pita crackers.

After our appetizer of cheese and pita crackers and beer we settled in to wait on the veggies before cooking up the shrimp. I decided to make a cheese sauce for the whole thing using leftover cheese soup (based on the recipe from a Townsends video) that didn’t quite end up cheesy enough when first made. I added more cheese to the defrosted mass and when we melted that over the fire it turned out wonderfully. 

Once everything was smoked, melted, grilled, and mixed it was time to eat. The sun was just below the the trees though maybe not quite officially set and the temperature was definitely falling. But with the exception of our toes we were warm and the dinner was ready: time to eat; time to enjoy. We did both.

There isn’t a precise recipe for this meal. I based my spice combination on what my Dad and I (and Lil) like for the shrimps alone sizing it up some to include the Brussles Sprouts (16 ounces) and potatoes (about 2 pounds) and 16 ounces of medium-sized (peeled) shrimps. The sesonings were salt, pepper, garlic, and paprika. 

It is always nice to sit around a good hot fire with people you like and a meal you can enjoy. If there is a little adversity thrown in the mix perhaps that justs a bit of zest to the experience.

Saturday, December 25, 2021

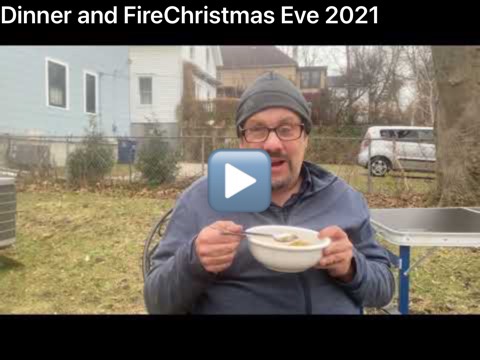
Dinner and Fire Christmas Eve 2021

Play video Dinner and Fire Christmas Eve 2021
▶️ Play Dinner and FireChristmas Eve 2021

It was floating around 50°F yesterday afternoon under heavily overcast skies. It was quiet with little going on anywhere nearby. I got the coals heating up just after 9:00AM and the 3-pound boneless pork shoulder (Boston butt is another name for it though I’ve no idea why) was ready to be placed inside the Weber Kettle. I hoped I had the temperature close to where I wanted it but was pretty sure I did not (I’d ruined my Thermoworks thermometer by leaving it attached to the grill and it melted the housing). Hope for the best.

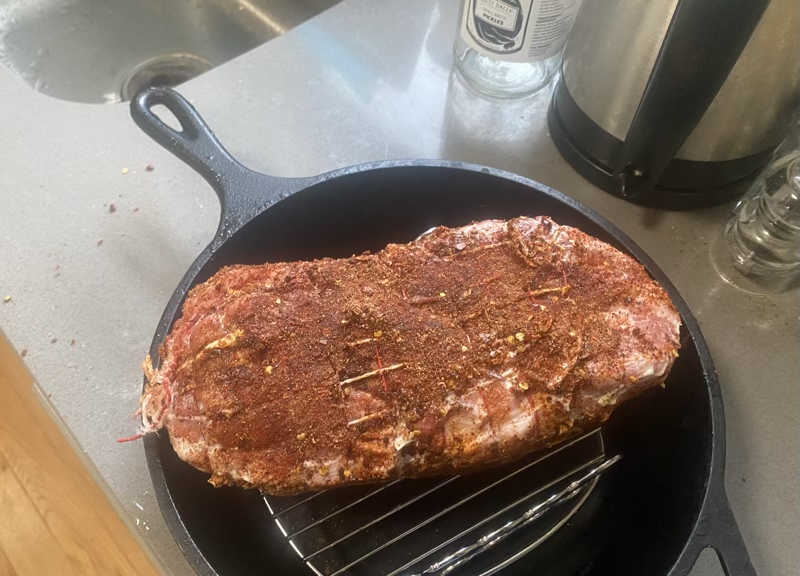
Pulled Prok Coated in Dry Rub Photo taken December 23, 2021 at 12:41

About 3 hours later the pork was creeping towards 160°F whih was pretty good proof that it had been generally cooking at a lower than I had aimed for. Oh well, add more coats, spritz the meat, and go do errands for a while. That is when I found out with Lil, where the real action was: parking lots around grocery stores. It’s good I didn’t need anything (or so I thought).

When we got back the meat was cooking steadily along though slowly. That’s when I decided to wrap it and basically braise it for the rest of the cook. What I had hoped would be a 5 or so hour cook would end up being more like a 7-hour cook. That doesn’t include the resting time.

As the meat cooked we dove into the soup course, chatted around the Breeo Fire Pit, and drank more beer than we probably should have as we discovered that it is really hard not to just devour high-quality kettle potato chips.

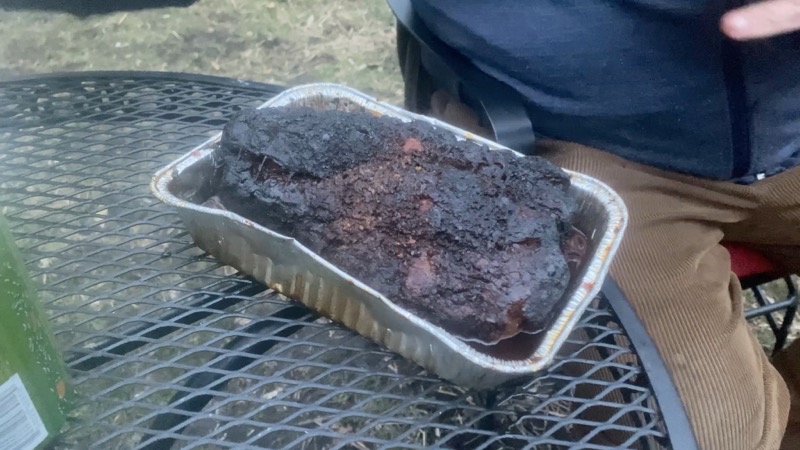
Photo taken Dec 25, 2021 at 1:42 PM

More like a seven hour cook than a five hour cook which is what I was hoping for. But the pulled pork looks good. First bite was also good. But, remember let the meat rest for longer than you think it needs. We did not let it rest long enough.

--December 25, 2021 at 1:42 PM.

Cooking is always an experiment. Cooking over tempermental coals more so. But while we could see where it could have been better our afternoon and early evening dinner by a fire was still a sucess. The pulled pork was tasty, the coleslaw superb, and the homemade vegetable soup certainly hit the spot while we waited for the meat to finish cooking.

Tuesday, December 21, 2021

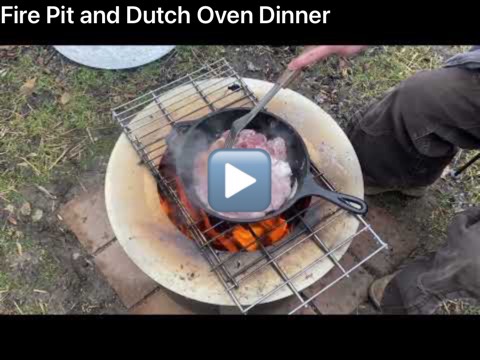
Breeo Fire Pit and Lodge Dutch Oven Dinner

Play video Fire Pit and Dutch Oven Dinner
▶️ Play Fire Pit and Dutch Oven Dinner

At least it isn’t windy outside. The temperature is in the upper 20s °F and the sky is overcast. That’s a big improvement from the previous day which through in freezing rain so all is about as good as can be hoped for as autumn gives way to winter.

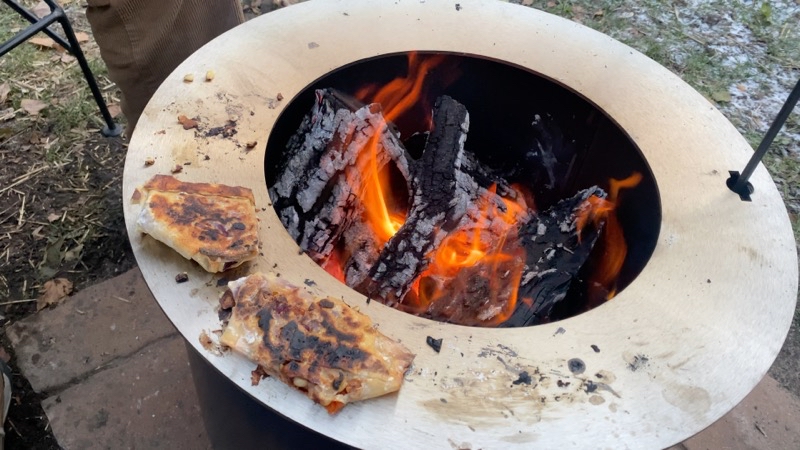
With the Breeo putting out ample heat we managed to stay comfortably warm as we worked to get dinner prepared: Pork a la Normand, Spinach and Artichoke Pierogis, baked potatoes, and beer. Maybe a slightly unbalanced meal lacking a good salad course (I got lazy) but a good one. I’ve made, and written about, the Pork a la Normand before. I do suspect that an hour simmering is generally enough time but the extra 20 to 30 minutes cerainly doesn’t hurt. The baked potatoes absorbed some smokiness flavor into their skins but we had trouble cooking them through in the Weber Kettle even though it claimed to be hot enough (can’t trust the lid thermometer). Wrapping the spuds in tin foil and putting them next to the fire in the Breeo for the last 20-25 minutes did the trick. The pierogis should’ve cooked wonderfully on the sear-plate. After all, my egg rolls certainly did. However, they singed before they heated through. Maybe the plate was a lot hotter this time. I do not know. Finishing the pierogis off by pan-frying them in a cast-iron skillet over the fire in the Breeo worked.

Pork a la Normand (pork and apples)

  • 1 Granny Smith Apple. Cored, peeled, cut into small pieces.
  • 1 Modest-sized onion (I used about half of what was once a truly huge red onion and I think the flavor was wonderful). Cut into small pieces.
  • 1 pound (likely a bit less) boneless pork loin chops. Cubed.
  • 1/4 cup flour.
  • 1 12-ounce can hard cider though I bet regular cider would be good too (beer also works).
  • 1 Tablespoon black pepper (could’ve used a bit less though LIl loved it).
  • 1 Teaspoon salt (could’ve used a bit more).
  • 1 Teaspoon ground nutmeg (maybe a bit more next time).

Directions

  1. Butter or oil (I used butter that I let melt) a preheated skillet or dutch oven bottom.
  2. Cut the pork into bite-sized cubes (or so) and coat with the flour. Place the pork in the pan and sear it until it browns on all sides. Remove from the pan and put somewhere to keep warm. You’ll add it back in a bit.
  3. Sauté the chopped apple and onion pieces until the onion starts becoming translucent. Add the seasoning and cider.
  4. Bring the mixture to a boil and simmer for a couple minutes before returning the pork cubes to the mixture. Cover and cook until the gravy thickens. This should take about 50 minutes (Note: seems like 75-90 minutes is better but maybe those times it was cooking at a lower temperature).

Wednesday, December 8, 2021

DIY Fire PIt Hearth and First Cook

Photo taken Dec 7, 2021 at 3:19 PM

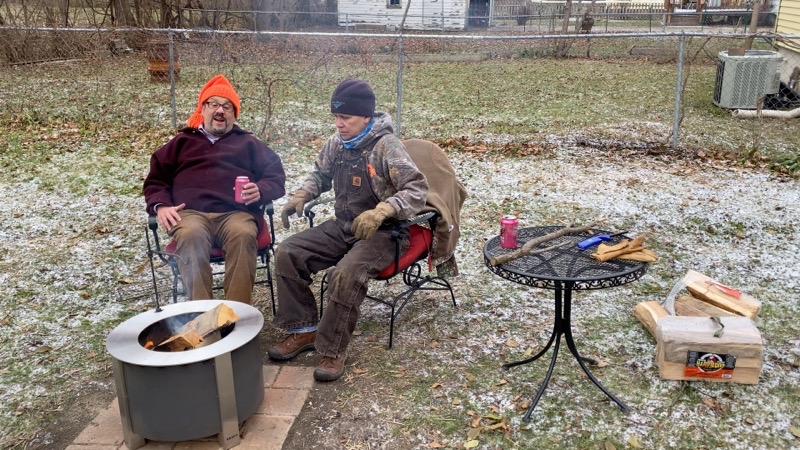
The flames aren’t really obvious yet but we have made fire. It’s time to celebrate with a beer.

--December 7, 2021 at 3:19 PM.

Play video DIY Patio Hearth and Breeo Fire Pit First Cook
▶️ Play DIY Patio Hearth and Breeo Fire Pit First Cook

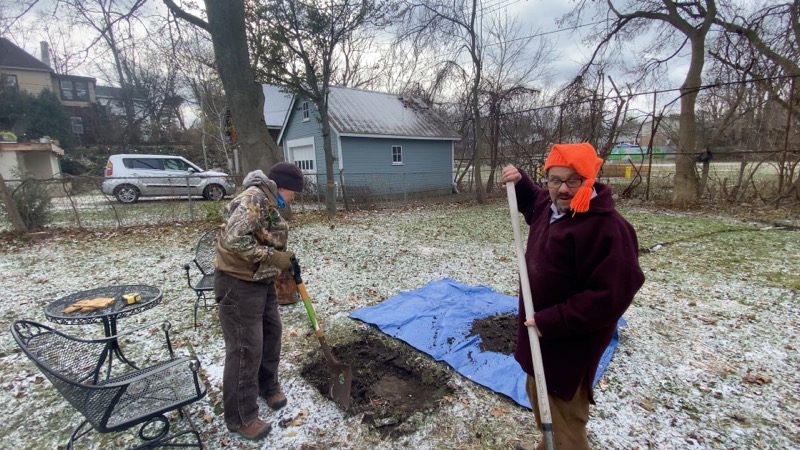
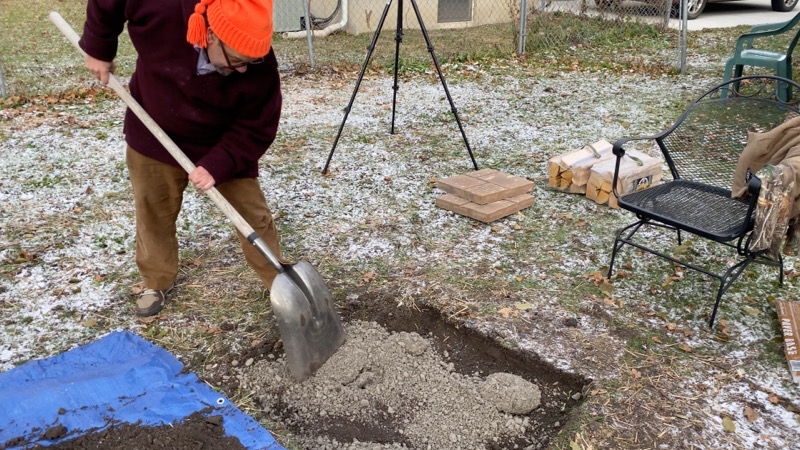
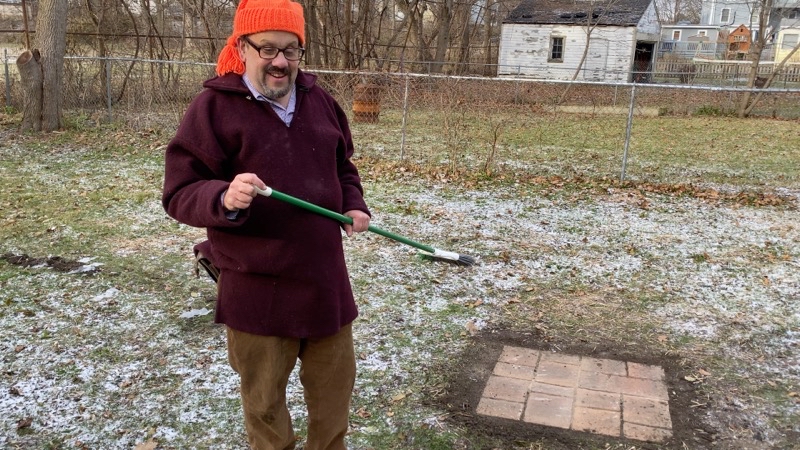
The ground isn’t quite frozen yet but it is far from soft easily dug into. While I certainly could have placed the Breeo X Series 19 directly on the ground as I had done with the decades-old metal fire buket I’d been using I decided I wanted something a bit classier and better for the backyard. I don’t need anything large so I settled upon a 32 x 32 inches square hearth to serve as the base for the new fire pit which has an outer diameter of just under 24 inches. I imagine I could have just bought paver stones and plopped them on the grass but a little research plus what Lil confirmed suggested that putting the pavers upon a paver-sand base was really the way to go. I assume the base materials (two types of materials: a chunkier aggregate and something much more sand-like) a laid atop each other and the pavers on top of everything. I expect that improves stability and helps with drainage. It isn’t a complex project just difficult because you have to work hard digging up the ground: a hole that is 32 x 32 inches saure and 4 inches deep. Ground that isn’t quite frozen yet but is certainly closer to that state than not.

Photo taken Dec 7, 2021 at 1:51 PM

Making progress on the 32x32x4 inches hole.

--December 7, 2021 at 1:51 PM.

Photo taken Dec 7, 2021 at 2:23 PM

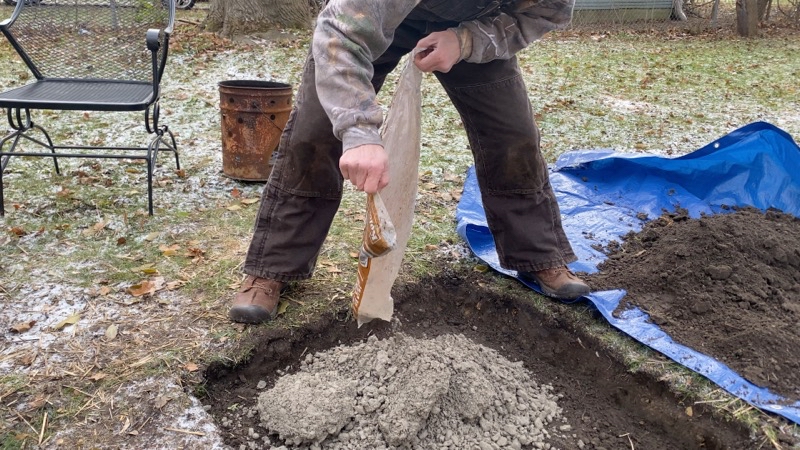
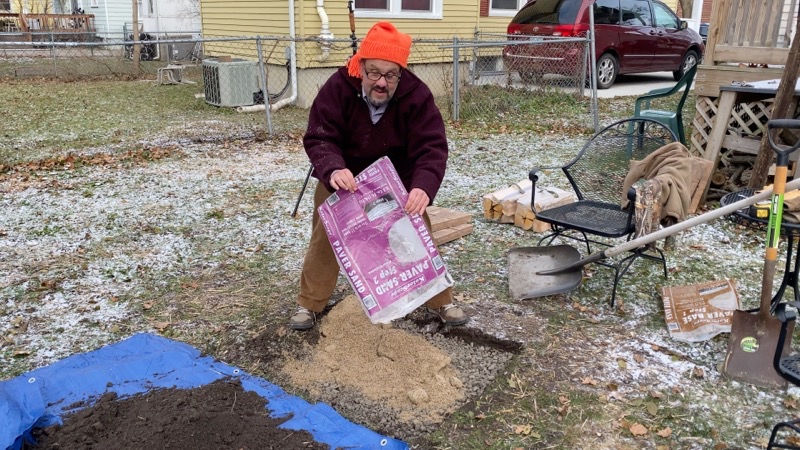
Paver base 1 material. I am pretty sure each bag weighed 50 pounds. We used one bag of base 1 and one bag of base 2.

--December 7, 2021 at 2:23 PM.

Photo taken Dec 7, 2021 at 2:23 PM

Spreading  out base 1 material. A bag holds just about enough for 32x32x1 inch sheet of material.

--December 7, 2021 at 2:23 PM.

Photo taken Dec 7, 2021 at 2:27 PM

Paver base 2 material. I am pretty sure each bag weighed 50 pounds. We used one bag of base 1 and one bag of base 2.

--December 7, 2021 at 2:27 PM.

Photo taken Dec 7, 2021 at 2:33 PM

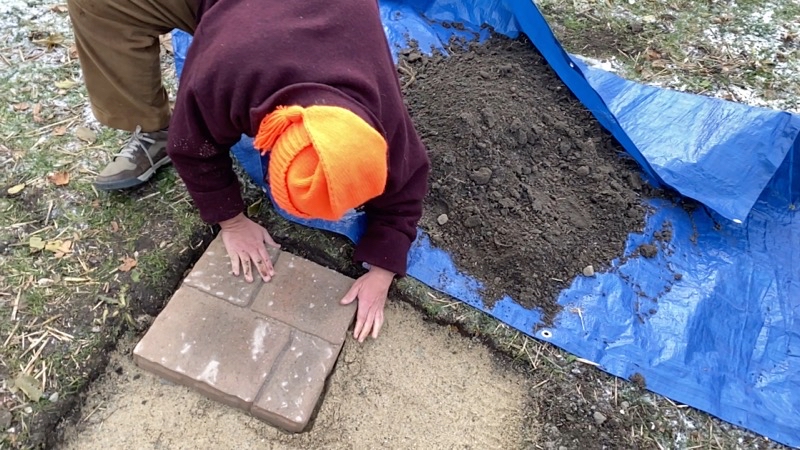
After about an hour of work it’s time to lay the first paver down.

--December 7, 2021 at 2:33 PM.

Photo taken Dec 7, 2021 at 2:38 PM

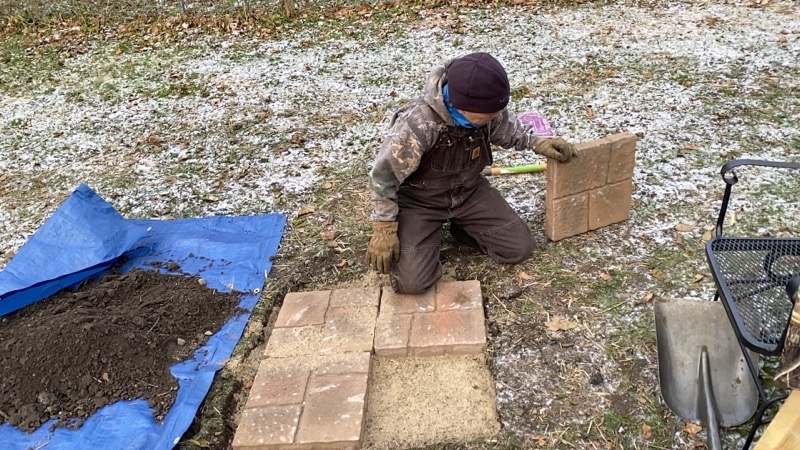
One last paver to go.

--December 7, 2021 at 2:38 PM.

The whole project of laying out the hearth (patio) took about 90 minutes and most of that time was spent digging out the dirt. Pouring in the paver base materials and smoothing them out didn’t take that long. Tamping them down took almost no time at all. Laying the 4 16x16 inch paver stones took little time. It probably took longer to fill in the gaps with dirt and paver sand than it did to place the pavers themselves.

I must say I did feel a nice sense of success and satisfaction once the project was completed. All that remained was to fill the Breeo fire pit up with the right kinds of fire starter, kindling, and logs and get the first fire burning.

Photo taken Dec 7, 2021 at 2:46 PM

All done but for some tidying up.

--December 7, 2021 at 2:46 PM.

Split Pea soup, egg rolls, and my Father’s wonderful marinaded shrimp were on the menu for the inaugural meal over the fire. I used my TJM Metal Works Oriignal Mini Fire Anchor to hold the dutch oven over the fire. That worked but I can see why the Outpost Grill, designed to work perfectly with the Breeo, would be a better option.

There is nothing too special about any of the recipes. However, here they are should you care to try them. Of them all my personhal favorite is definite the shrimp.

Marinated Garlic Shrimp

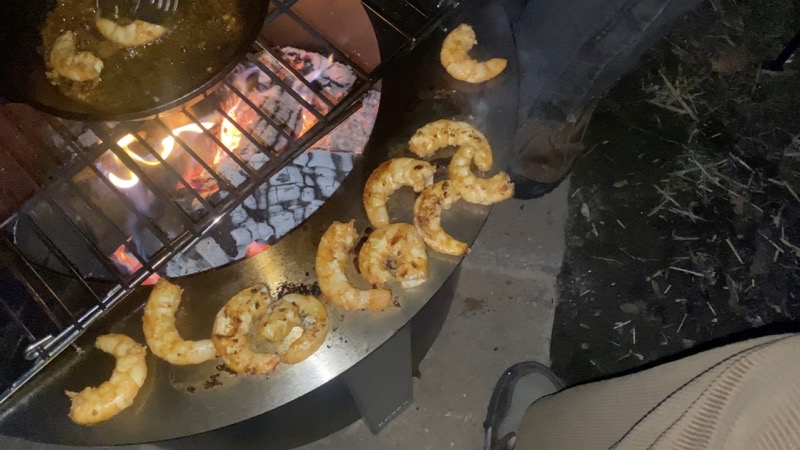
Photo taken Dec 7, 2021 at 5:41 PM

My Fathet’s super tasty shrimp on the searplate.

--December 7, 2021 at 5:41 PM. .

In a small bowl, mix:

  • 1 pound jumbo shrimp (16-20 per pound).
  • 2-3 clove garlic
  • 1 tablespoon salt
  • 1/2 teaspoon cayenne pepper
  • 1 teaspoon paprika
  • 2 tablespoons olive oil
  • 2 teaspoons lemon juice

  1. In a large bowl, mix shrimp with garlic etc. until shrimp well-coated.
  2. Lightly oil cooking pan. Cook shrimp for 5-7 minutes, occasionally stirring. We cooked them on the searplate for a few minutes on each side (as if grilling).

Egg Rolls

Photo taken Dec 7, 2021 at 4:52 PM

It’s time to have an egg roll dipped in homemade honey mustard sauce.

--December 7, 2021 at 4:52 PM.

  • Wonton wrappers (I used 7” square wrappers)

Use enough to create between 1/4 - 1/3 cup of filling for each egg roll:

  • Shredded (red) cabbage
  • Chopped carrots
  • Frozen corn
  • Diced new potatoes
  • salt and pepper to taste plus whatever other spices you feel like.

Honey Mustard Sauce

  • Equal parts mustard, mayo, honey.
  • For each ounce of the above parts add 1/2 tablespoon vinegar (I only had balsamic which worked fine).
  • For each ounce of a component part (eg if you used an ounce of honey you would use 1/8 TSP. Did not sum up the entirety of the component parts, in this example that would mean do not use 3/8 TSP.) use an 1/8 teaspoon cayanne.

Directions

  1. Mix all the ingredients together.

  2. Steam the veggies for about 5 minutes. I used my microwave to do this. Just put them in a bowl, cover the bowl, and run your microwave on high. Of course, you can steam using a steamer basket or probably steam-bake the veggies.

  3. Place between 1/4 - 1/3 cup of filling in each wonton wrapper. To seal the wrappers moisten your fingers and fold the wrapper over itself. If you accidentally use 2 wrappers things will be fine.

  4. I baked my egg rolls on a baking sheet I put lightly oiled foil on. Lightly oil the egg rolls themselves. You could deep-fry (or maybe pan-fry) them instead. Bake at 425°F for 10-12 minutes.

  5. You can freeze the egg rolls after making them and they’ll reheat just fine. It didn’t take long on the searplate of the Breeo.

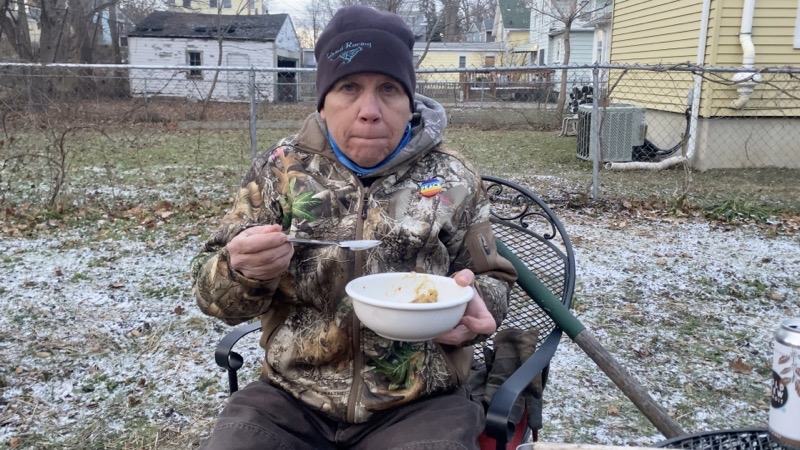
Split Pea Soup

Photo taken Dec 7, 2021 at 4:52 PM

Taste test of the Split Pea soup by Lil.

--December 7, 2021 at 4:52 PM.

  • 1 onion, chopped
  • 1 cup of dried green or yellow split peas
  • 1 potato, chopped
  • 1 quart of vegetable or beef broth
  • 1 teaspoon salt
  • 1/2 teaspoon pepper

Direction

  1. In large saucepan, heat 1 teaspoon oil and add onion.
  2. After about 5-7 minutes, add potato, peas, broth, and seasoning. Bring to boil, cover, reduce heat.
  3. Cook until potato and peas tender to bite.
  4. In blender or food processor, whirl mixture, a portion at a time.